the beat.heat.street.

Tuesday, December 11, 2012
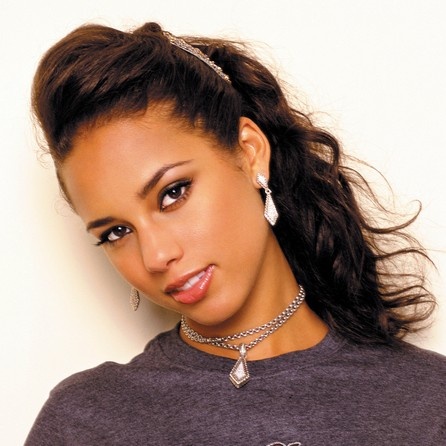
Inspired by Alicia Keys Hair
I absolutely love Alicia keys edge-y style. I keep practicing on my hair to make it more...edge-y, haha and most of the time it doesnt look as great. but with all that practice I finally semi perfected this style. For a more finished polished look, i will curl my hair next time around. My ultimate challenge will be this one! ...I can not wait....
and this one...
Thursday, September 6, 2012
Inspired by Adele Makeup tutorial
I love doing Makeup, and I love watching Makeup tutorials on Youtube. but I am not a huge youtuber so I'd rather take step by step pictures of the process...and as you can tell I do not have as much makeup on as Adele, but it is inspired by her retro style.
Start with a clean slate: foundation, blush, highlighter and bronzer all in place
#1. shimmer up that lid
#2. line your crease with a light brown to set way for the black
#3. Wet a flat-head brush and then add black shadow, this will give a more defined look. It may look funny and uneven, dont worry though, more blending to come.
#4. with a lid applicator, fill in wings and blend in the crease a bit
#5. Liner and mascara. great retro look for any occasion. I tone the entire process down a bit if I feel like wearing it just for the day, which currently I am doing alot.
Tuesday, September 4, 2012
Boring desk to Makeup Station
Okay, so I have a bit of a bad habbit. I get too excited about a project I am working on, and always forget to take a before picture. I did however find a desk online that was the same color as the before and overall looked semi-similar, I suppose you can use your imagination :)
Since this is a Makeup station makeover, I needed sweet containers to just tie the whole look together, I've had the bamboo containers since I was in High School, and I purchased the silver and glass ones at Goodwill for .99 cents each!
I then organized all my makeup accordingly; face, lips, eyes, ect....
A couple of HUGE DIY tips; clean the surface of whatever you are painting first. Be sure there is absolutely no Dirt anywhere...Oh...ITS IMPORTANT! Secondly, use KILZ spray paint primer, its AMAZING, I have tried other primers before and they just suck. Then coat color of choice over primer..let it dry between coats...and ... test your spray skills on a peice of cardboard. too close, and it drips...too far and you are wasting half your paint.
I replaced all the hardware for just $5.00! don't rush into a purchase and spend too much..i got lucky and found these on sale at Lowes :)
Here is my first drawer, I organized it by the first step in the Makeup process; Concealer, Foundation, blush, bronzer, and Highlighter. simple as that. (also i lined my drawers with random cute paper I had lying around).
Second drawer consists of eye stuff, and a map of Mother RUSSIA :)
final drawer consists of all my shadow pallets and eye stuff brushes. :)
THats the finished product! if you are wondering where my mirror is...currently I have a huge mirror that serves dual purposes..and its a safety hazard to leave it up...but perhaps soon I will find one at Goodwill or something. :)
Monday, August 27, 2012
DIY 1st Birthday Party
1. Home-made cake and Fondant Fondant: Recipe

2. tissue paper garland and inexpensive table cloth from party city
3. Strung lights, table cloth and stacked wood to add to the romantic feel
Saturday, August 11, 2012
A Head-Board UpLift
1. I taped off my design ( I got this headboard for free, my in-laws were throwing it away so I snagged it to save it :)
2. Tested out my colors on a part of the headboard that wouldnt be seen. (using a martha stewart painting kit to create the striped design/ also martha stewart paint in small tubs that average $5.00)
3. I had a difficult time with the Martha stewart design.. eventually just painted that entire area gold and tried the design on the blue, I am so glad I messed up because I loved the way it turned out
4. gorgeous, and my husband loves it too!
Thursday, May 3, 2012
By the by...I am pregnant again. And to let you know I will be posting updates on my other blog called:Baby days I have my first pregnancy info up there too. But for this time around I hope to be giving poor moms like me good advice on how to look cute on a budget. Also diet info...because I struggled with that my first time around. here I am pre-pregnancy!
Vintage to Modern
Steps 1, 2, 3:
I have been lately obsessed with 18th century theme for my house, but at the same time; its over-whelming. Its so easy to see that white is an instant Modernizer. I love how the frames are all from different places and have different designs, but come together with a coat of white paint.
For the easiest and best finish, use KILZ primer first, and after that is finished drying, coat whatever color you desire. I chose the White Satin from Valspar because it has such a smooth finish.
Subscribe to:
Posts (Atom)
dk and tea

Russian Ava


